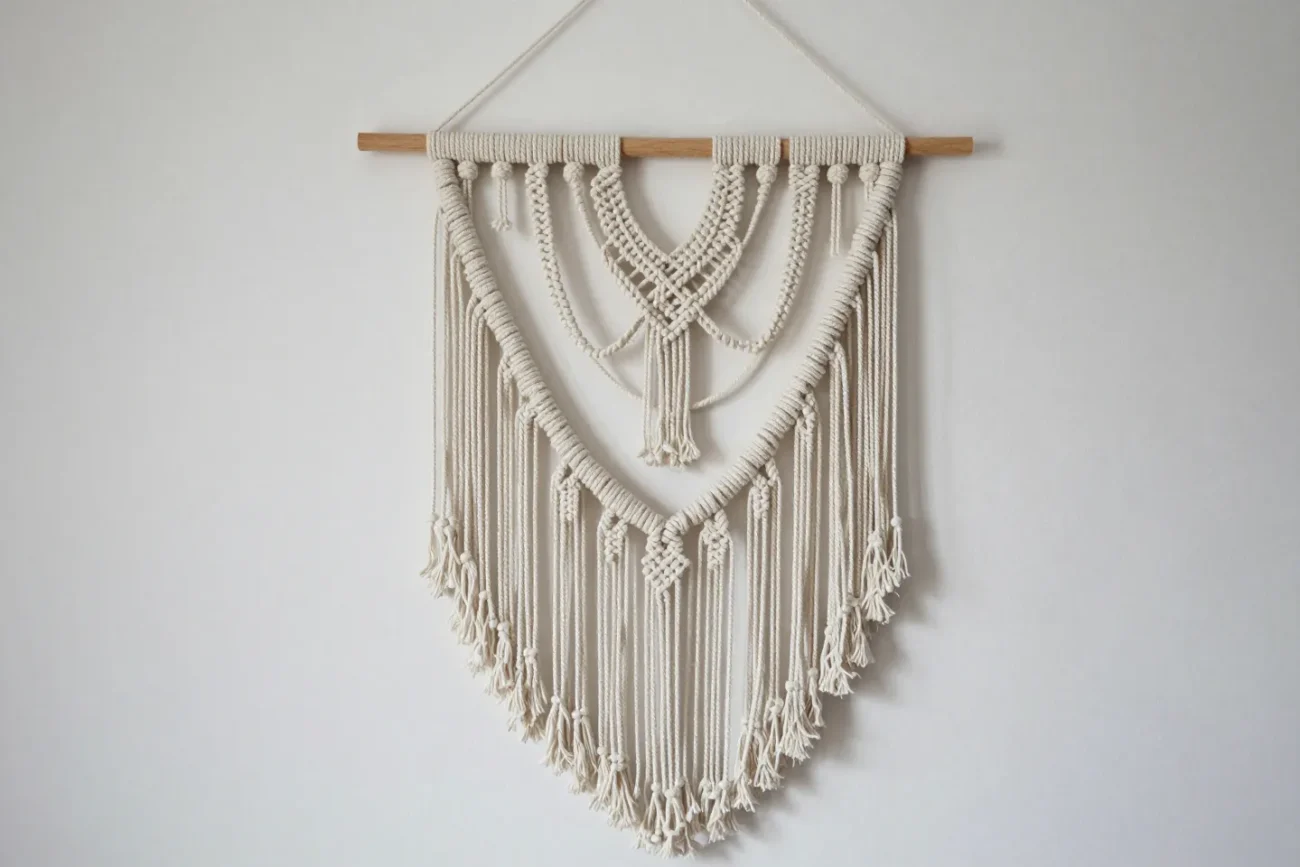
You want that airy, boho wall moment without paying boutique prices? Same. Macrame brings big texture, cozy vibes, and way more satisfaction than scrolling for hours. You’ll knot some cord, sip something delicious, and end up with a wall hanging that looks like you definitely have plants you remember to water. Let’s make one—no fancy skills required, just patience and a good playlist.
Gather Your Supplies (Nothing Wild, Promise)
You can keep this simple and affordable. IMO, start with neutral cord and a wooden dowel so your design stands out. Then play with bold color once you get the hang of it.
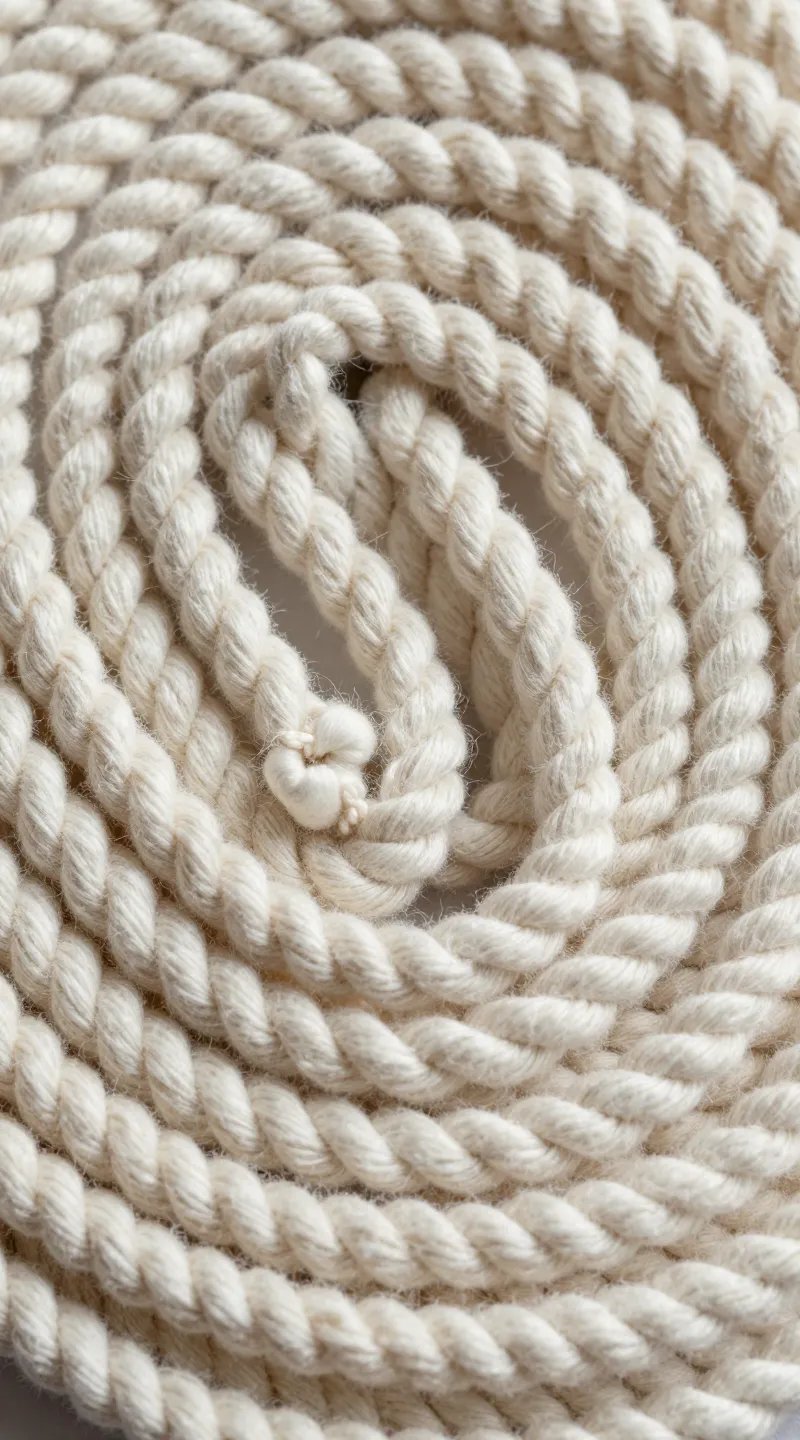
- Macrame cord: 3–5 mm cotton cord works best for beginners. Get 100–200 feet depending on size.
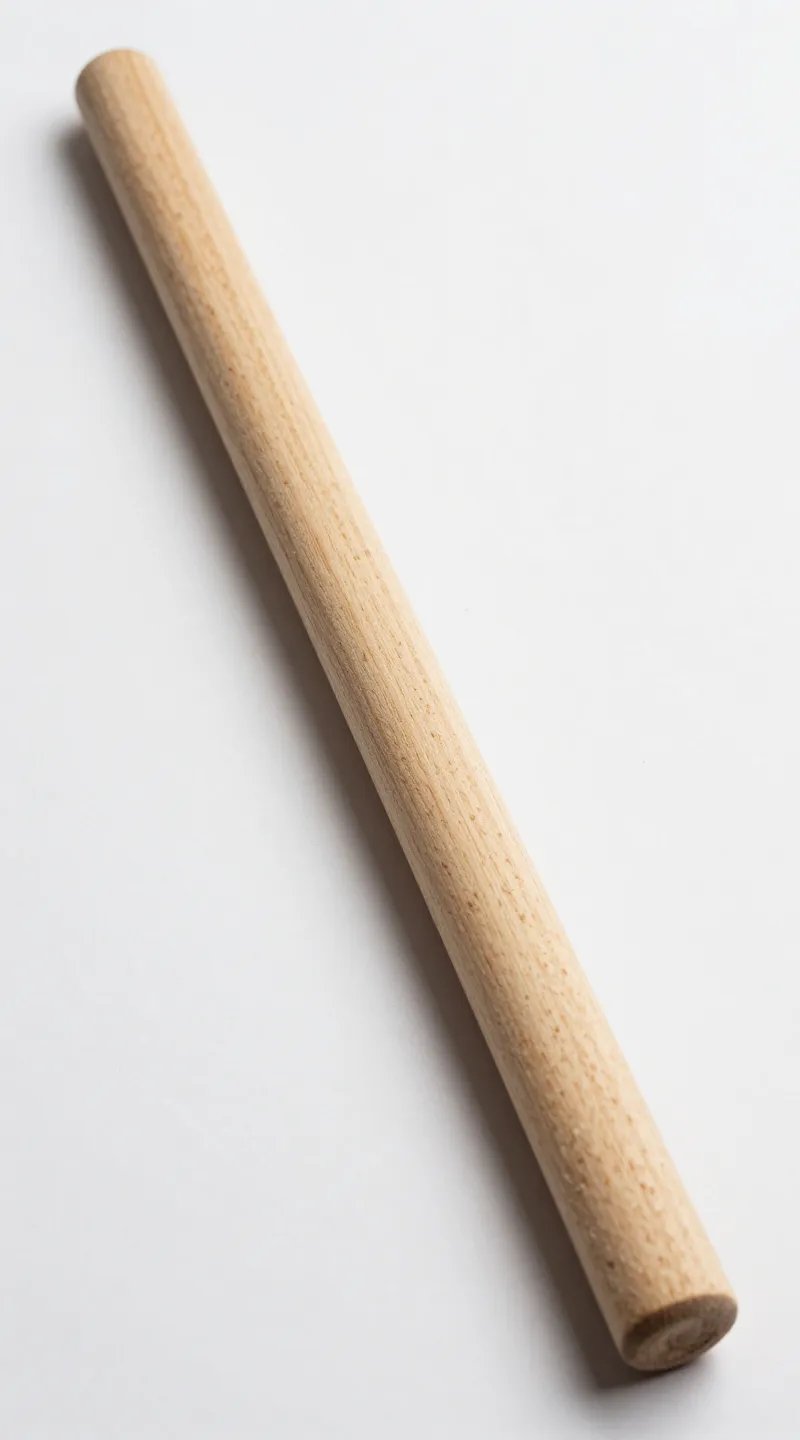
- Wooden dowel or branch: 12–24 inches long. A smooth stick looks rustic and cool.
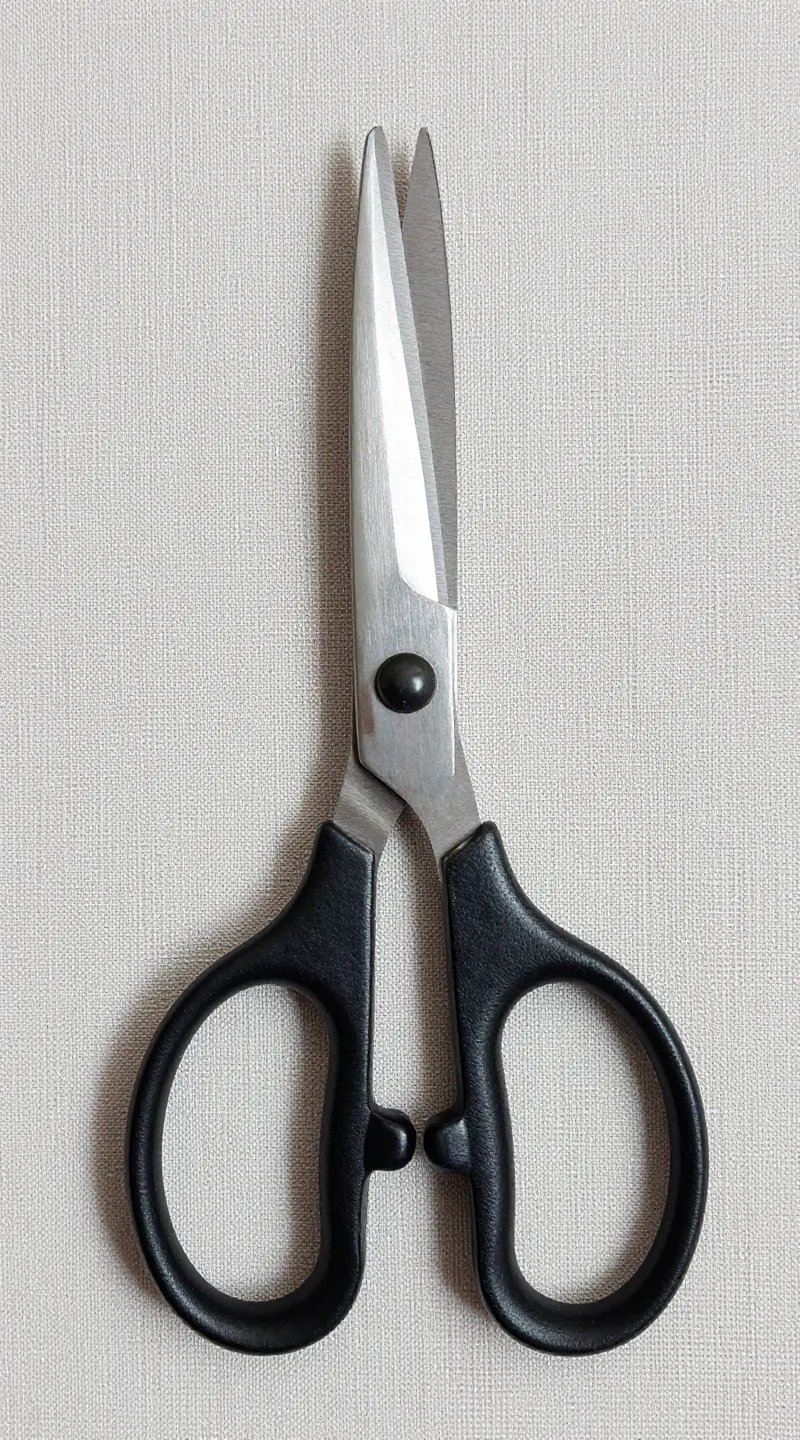
- Measuring tape + scissors: Sharp scissors are key—or you’ll fray like crazy.
- Comb or pet brush: For fringe fluffing.
- Optional: Beads, dye, masking tape, S-hooks to hang your rod while you knot.
How Much Cord Do You Need?
Quick formula: Each working cord should be 4–6x the length of your finished hanging. For a 20-inch hanging, cut cords 80–120 inches. Sounds extra, but knots eat length like it’s snacks.
Prep the Base Like a Pro
Decide on width. Want a small piece? Use 10–14 cords. Going bigger? 20–24 looks lush without getting chaotic. Cut cords first so you don’t stop mid-flow.
- Cut cords: Cut 12–20 cords to your calculated length.
- Attach to dowel: Fold each cord in half and tie a Lark’s Head Knot: slip the loop over the dowel, pull the tails through the loop, tighten.
- Even things out: Check the tails so they hang evenly. Slide knots along the dowel to space them evenly.
Pro Tip for Neat Starts
Tape the dowel to a table, or hang it on two cabinet knobs. Keep it stable so your tension stays consistent. Your future self will thank you.
Meet the Core Knots (Your Whole Design Lives Here)
Three knots carry 90% of macrame. Master these, and you can riff like a jazz musician, except with cord and no sax.
- Lark’s Head: You already used it to attach cords. Easy.
- Square Knot (SK): The MVP. Four cords per knot—two working cords outside, two filler cords inside.
- Half Hitch (HH) and Double Half Hitch (DHH): For clean diagonal lines and curves.
Square Knot in 10 Seconds
- With 4 cords, cross the left working cord over the two center cords and under the right working cord.
- Bring the right working cord under the center cords and up through the loop on the left. Tighten.
- Repeat from the other side. That’s one full square knot. Clean, balanced, chef’s kiss.
Double Half Hitch Basics
- Pick a “holding cord” and angle it the way you want the line to go.
- Wrap a working cord over and through the loop around the holding cord twice. Tighten. That’s a DHH.
- Repeat with the next cord along the same holding cord to build lines.
FYI: Keep tension consistent. Looser knots look relaxed; tighter knots look structured. Neither is wrong—just pick a vibe and stick to it.
Design a Simple, Stunning Pattern
Let’s build an approachable layout. You’ll get texture, symmetry, and a little drama without pulling your hair out.
Step-by-Step Pattern
- Row of Square Knots: Starting under the dowel, tie a row of SKs across. Use groups of 4 cords for each knot.
- Alternating Row: On the next row, skip the first two cords and tie SKs with the next sets of 4. You’ll create that classic net pattern.
- Chevron with DHHs: Choose the center cord as the anchor. Angle it down left, then down right, making DHHs with each adjacent cord to form a V shape.
- Statement SKs: Add 2–3 rows of SKs under the V to thicken the middle.
- Open Space: Leave a few inches of loose cord for movement. Controlled chaos = boho gold.
- Finish with Fringes: Tie a final row of SKs or DHH lines, then trim the bottom into a V or soft curve.
Want Extra Texture?
- Spiral Knots: Tie half of a Square Knot repeatedly (left side only) to create twists.
- Berry Knots: Stack several SKs, then push them up to create a chunky “berry.”
- Wrap Knots: Bundle several cords and wrap a shorter piece around them for tassels.
Customize It: Color, Beads, and Balance
Keep it minimal or go boho maximalist. Both work—just repeat elements so it looks intentional and not “I glued every craft supply to it at 2 a.m.”
- Color: Dip-dye the fringe for an ombré effect. Test on a scrap cord first. IMO, earth tones age better than neon.
- Beads: Slide wooden beads onto center cords before knots. Secure them with an SK underneath.
- Asymmetry: Build a heavy texture on one side and offset with a longer fringe on the other. Artsy without trying too hard.
- Layering: Make two narrow hangings and overlap them on the same dowel. Instant depth.
Clean Finish: Trim, Comb, Fluff
Finishing turns “I tried macrame” into “I make custom wall art now.” Go slow here.
- Trim: Use tape to mark a straight line, V, or curve. Cut past the tape for crisp edges.
- Comb: Brush the fringe from the ends up. Trim flyaways for a sharp finish.
- Steam or Press: Light steam settles the cords. Don’t soak—just a little spa day.
Hanging and Care
- Mounting: Use two small nails or hooks. Center it at eye level for max impact.
- Maintenance: Dust gently with a lint roller or blow with a cool hairdryer. Keep it away from spaghetti sauce splatter, obviously.
Common Mistakes (And Easy Fixes)
- Uneven cords: If one cord shortens fast, swap it with a longer neighbor mid-project. Nobody will notice.
- Wavy lines: Angle your holding cord firmly when making DHHs. The line follows the anchor, not your dreams.
- Over-tight knots: Loosen slightly so the piece hangs naturally. You’re making art, not a ship’s rigging.
- Fraying chaos: Tape ends while you work. Remove before combing.
FAQs
How long does a beginner macrame wall hanging take?
Plan 2–4 hours for a medium piece. You’ll go slower on the first one, then speed up once knots feel automatic. It’s basically a chill evening with a very cute payoff.
What cord type works best for that soft, boho fringe?
Single twist cotton brushes out into dreamy fringe. Three-strand cotton holds structure better but looks more rope-y. Both work—pick the texture you want.
Can I use a real branch instead of a dowel?
Yes, and it looks awesome. Clean it, sand rough spots, and seal it lightly if it sheds bark. Make sure it’s strong enough to hold your knots without bowing.
How do I fix a knot I messed up halfway?
Undo it. Seriously. Macrame cords forgive you. Use a needle or small pick to loosen knots, then retie. Better now than staring at the mistake forever.
What size should I make for above a bed or couch?
For balance, aim for 60–75% of the furniture width. Above a queen bed, 36–48 inches wide looks proportional. Keep height around 24–36 inches for a clean silhouette.
Can I make it renter-friendly?
Absolutely. Use small adhesive hooks or a single picture rail hook with fishing line. Macrame is light, so you don’t need heavy-duty hardware.
Conclusion
You just learned the core knots, a foolproof pattern, and all the finishing tricks. Start simple, keep your tension consistent, and have fun with fringe. FYI, once you make one, you’ll suddenly find a blank wall in every room. Go forth and knot—your boho era begins now.