You want a backyard that makes your friends linger, your kids ditch screens, and your dog somehow… chill? Build a fire pit. It’s the fastest way to turn a meh yard into a hangout.
And no, you don’t need to be a contractor or own a truck full of tools. You just need a plan, a weekend, and an excuse to buy marshmallows.
Pick Your Fire Pit Style (And Your Vibe)
You’ve got options, and they’re not all complicated. The right style depends on your yard, your budget, and whether you like the smell of smoke on your hoodie.
- Classic stone ring: Cheap, durable, and looks like it grew there.
You’ll use retaining wall blocks or natural stone.
- Modern concrete bowl: Clean lines, great for patios. You can DIY with a mold or buy a premade bowl.
- Steel fire ring or rim: Minimal effort. Drop one into a gravel base, surround with rock, call it a day.
- Gas-powered pit: Clean burn, instant on/off, no smoke.
Costs more, but IMO the convenience slaps.
- Upcycled wonders: Old washing machine drum, tractor rim, whiskey barrel metal ring—cool and affordable.
Quick Reality Check
Before you get romantic about glowing embers: check local codes. Some areas ban open burning or require specific distances from structures. FYI, many places require at least 10 feet from buildings, trees, and fences.
Location Matters (Unless You Enjoy Smoky Curtains)
If you put your pit in a wind tunnel or under a pine tree, you’ll regret it.
Pick a flat, non-wood surface away from eaves and branches.
- Clearances: Minimum 10 feet from anything that can burn. More is better.
- Surface: Gravel, pavers, concrete = yes. Bare lawn = okay with a base.
Wood decks = only with proper heat shields or a gas table rated for decks.
- Wind: Observe your yard for an afternoon. Choose the calm side.
- Traffic flow: Leave space for chairs and a walking path. Nobody wants to limbo over fire.
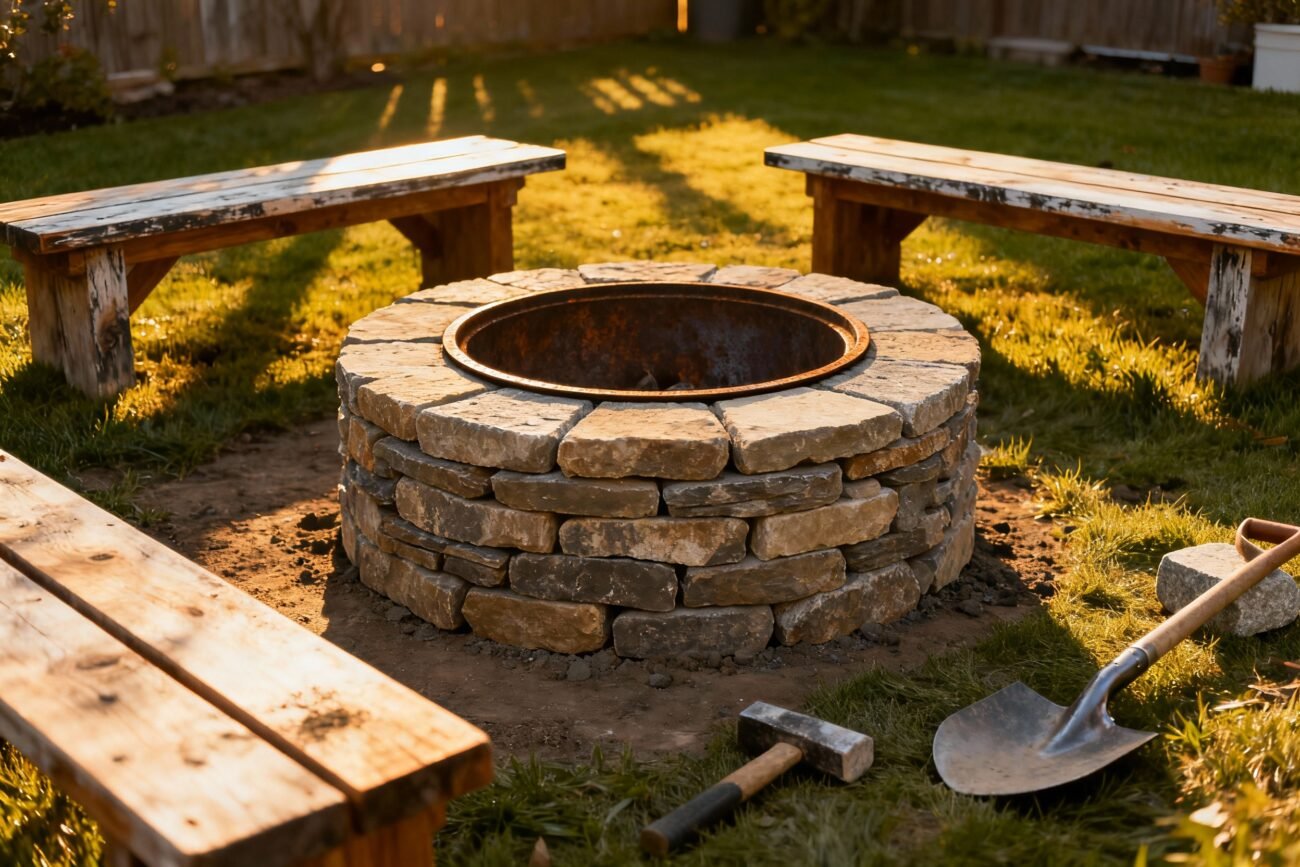
Project 1: Stone Ring Fire Pit (Weekend Warrior Special)
This is the classic DIY build.
It looks legit and only needs basic tools.
Materials
- 36–48 retaining wall blocks (depends on diameter)
- Gravel (about 6–8 bags)
- Sand (2–3 bags)
- Steel fire ring insert (optional but recommended)
- Landscape adhesive
Tools
- Shovel, rake, tamper
- Level and measuring tape
- Rubber mallet
- String and stake (for a perfect circle)
Steps
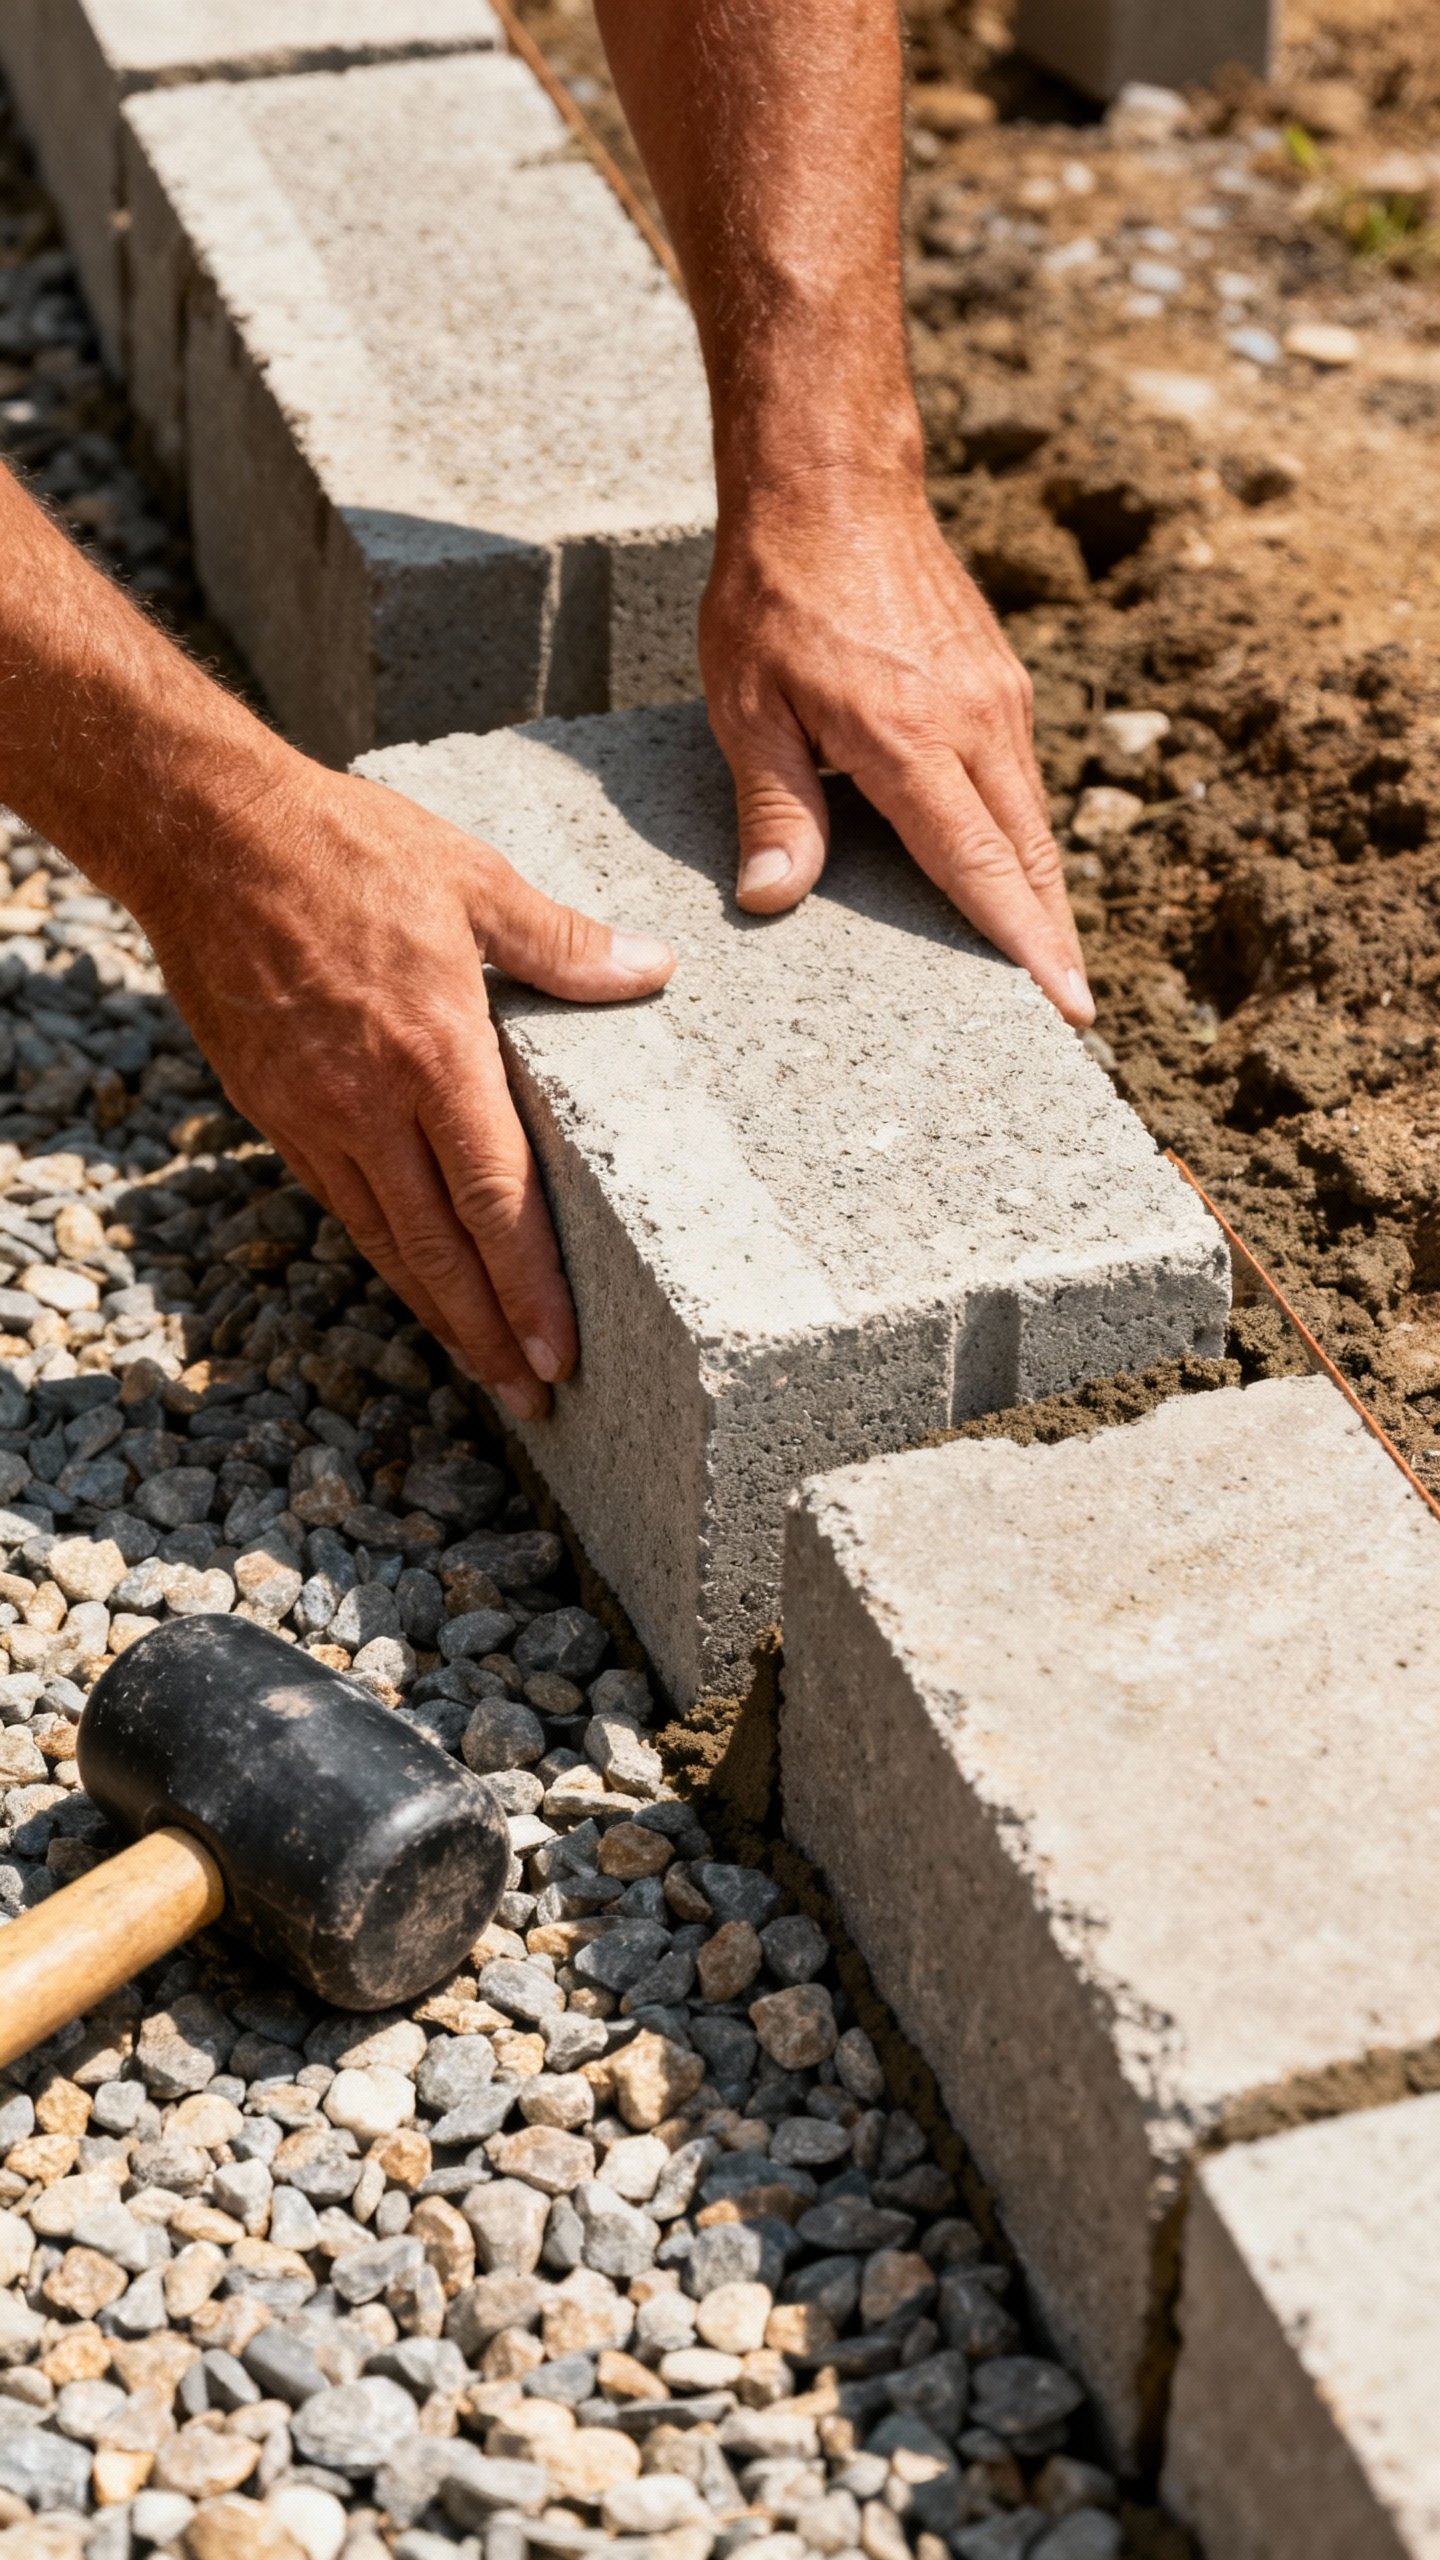
- Mark the circle: Stake the center, tie a string half your diameter, and trace.
- Dig the base: 2–4 inches deep. Remove grass and roots.
- Add gravel: 2 inches. Level and tamp firmly.
- Lay the first course: Place blocks in a circle.
Level as you go. This sets the rest up for success.
- Build up: Add a second and third course. Stagger joints.
Use landscape adhesive between layers.
- Insert fire ring: Drop it in. It protects blocks from direct heat and extends life.
- Finish the floor: Fill the interior with 1–2 inches of sand or pea gravel.
Pro Tips
- Keep it under 2 feet tall for good heat and airflow.
- Check level constantly. Uneven blocks will haunt you later.
- Don’t use regular mortar inside. It can crack and pop under heat.
Project 2: Concrete Bowl (Modern Patio Magic)
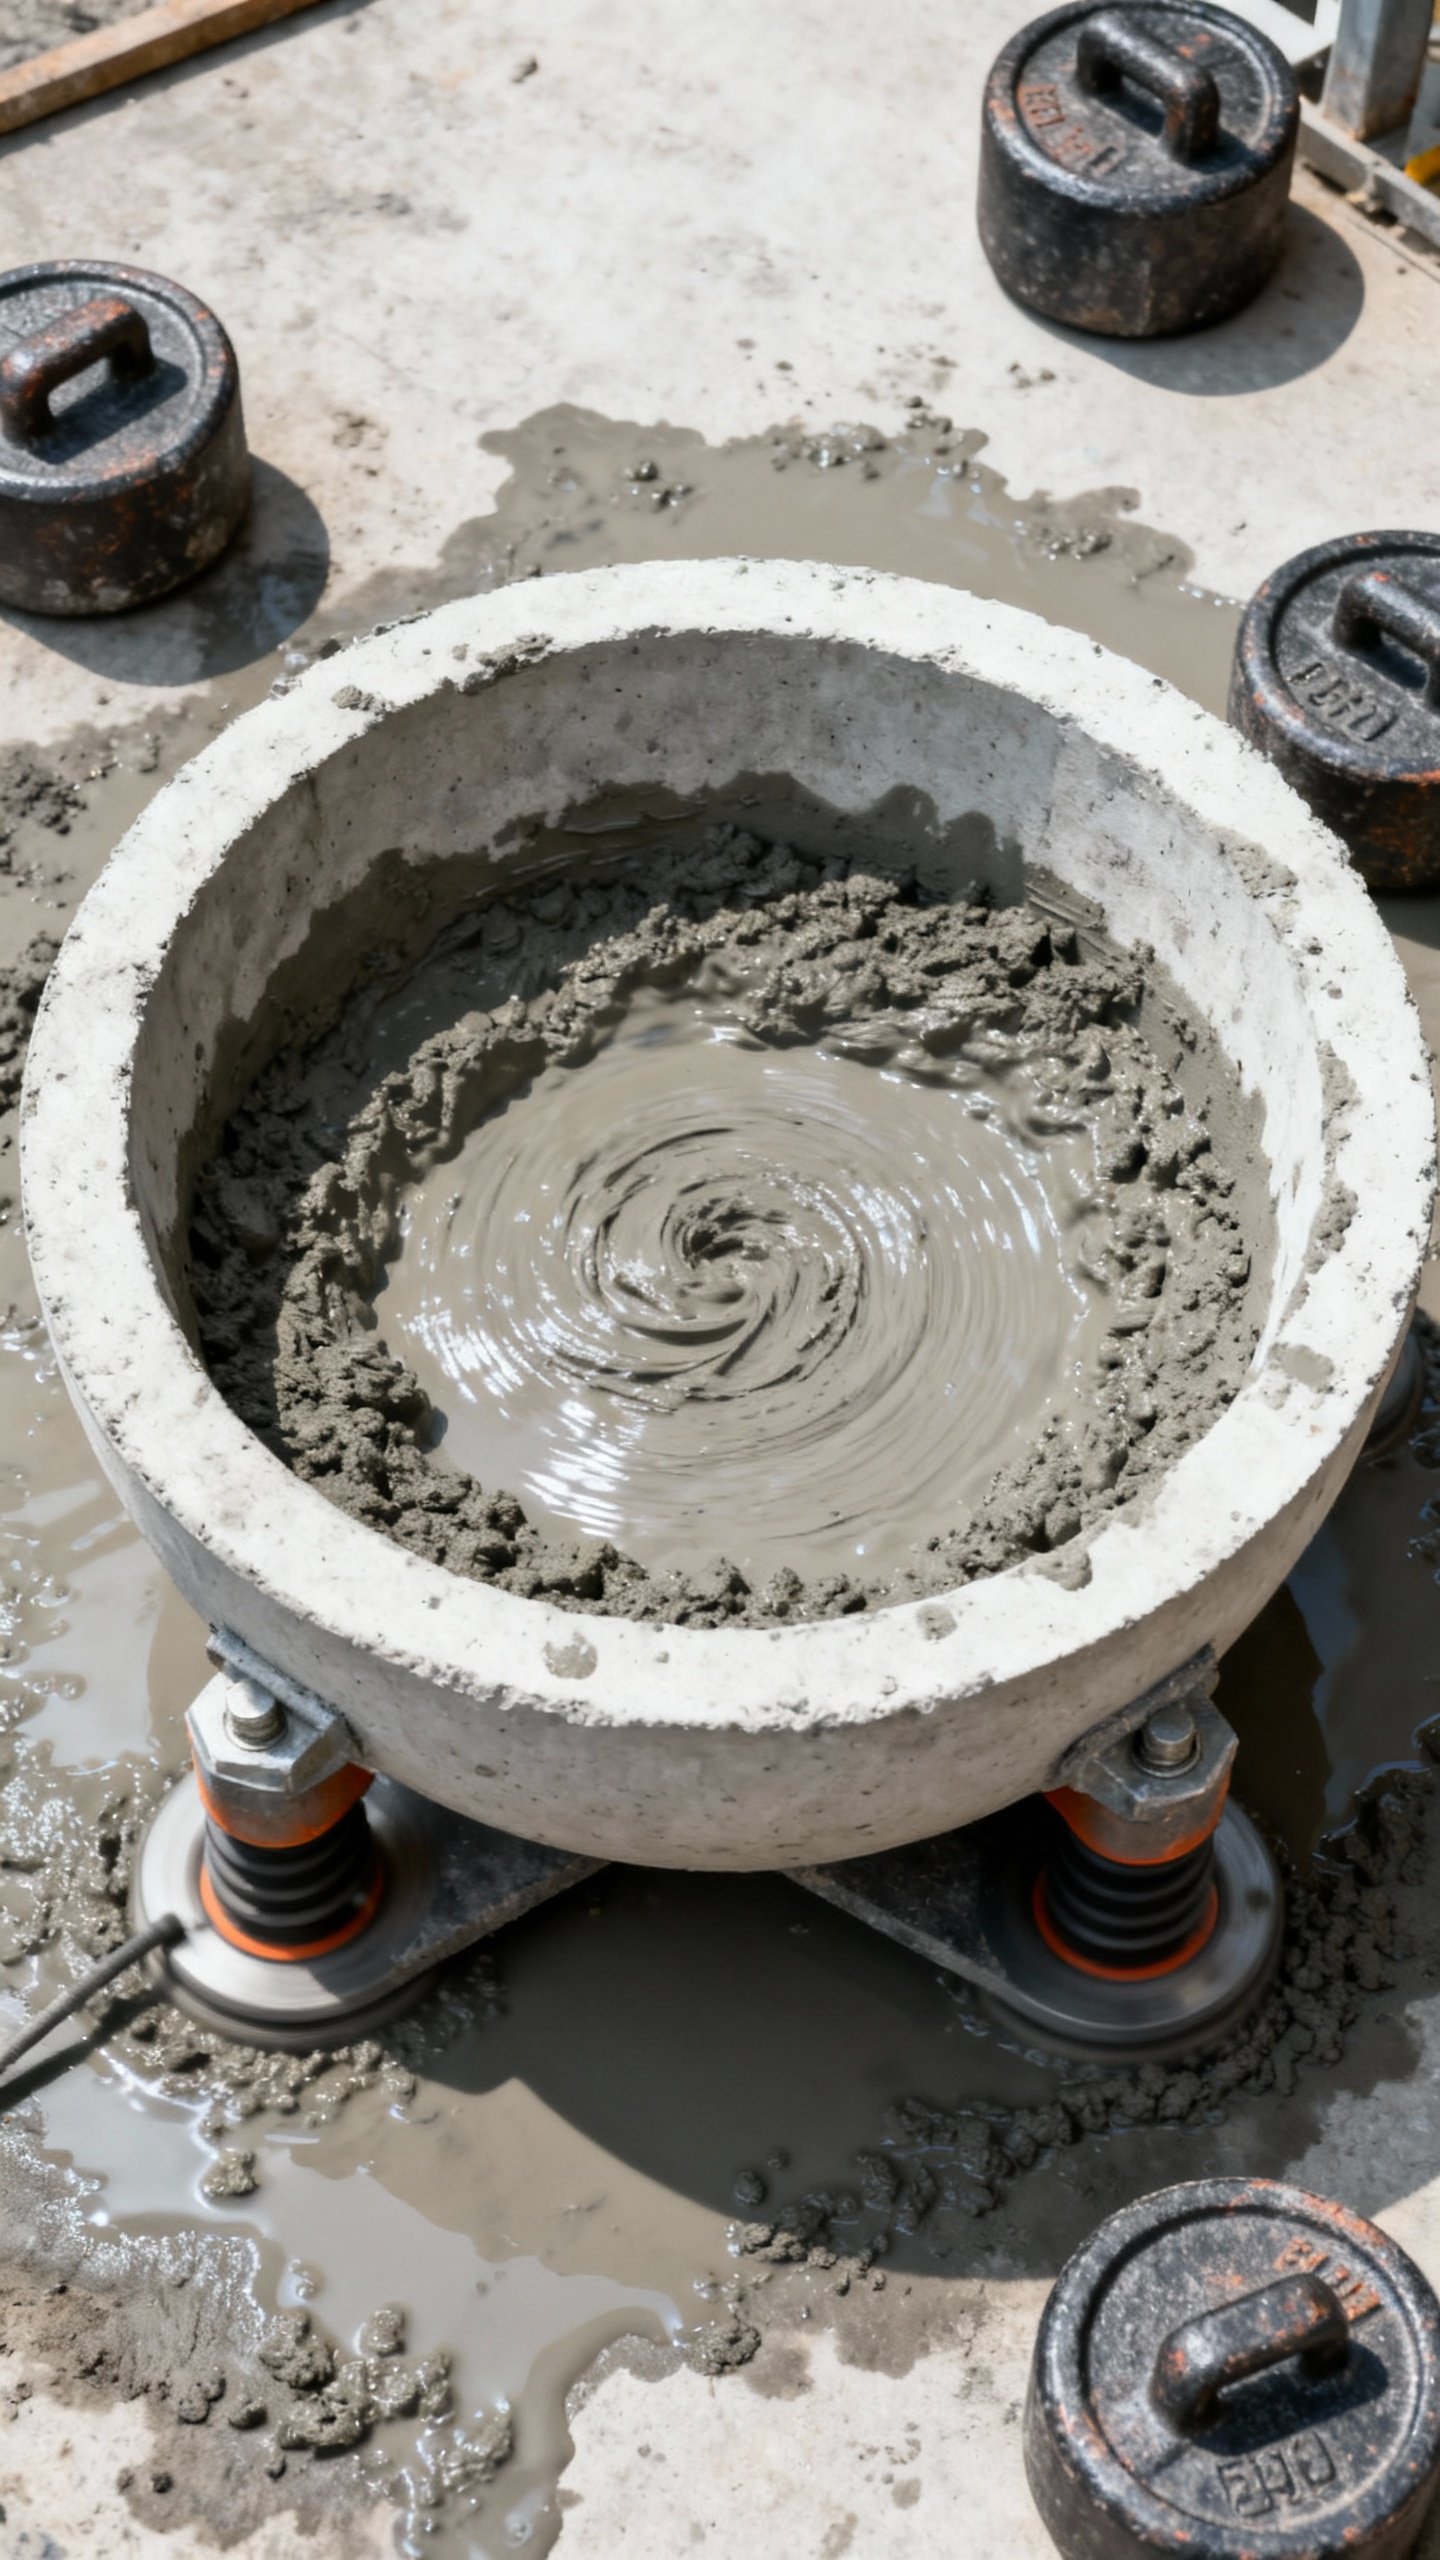
Want a sleek vibe without a designer price tag? Cast a concrete bowl with two plastic bowls as molds.
What You’ll Need
- Two nesting plastic bowls (big and slightly smaller)
- High-strength concrete mix
- Reinforcement: hardware cloth or fiberglass fibers
- Cooking spray or form release
- Fire media: lava rock or fire glass
- Gel fuel cans or a small gas insert (rated for fire features)
How-To
- Spray molds with release.
Mix concrete to a thick batter.
- Pour into the big bowl, press the smaller bowl in to form the cavity.
- Weight the inner bowl. Vibrate the sides to release bubbles.
- Cure 48–72 hours. Pop it out, sand edges.
- Add fuel: gel cans or a gas kit.
Cover with lava rock.
Note: This is decorative and great for patios. If you want serious log-burning flames, go with stone or steel.
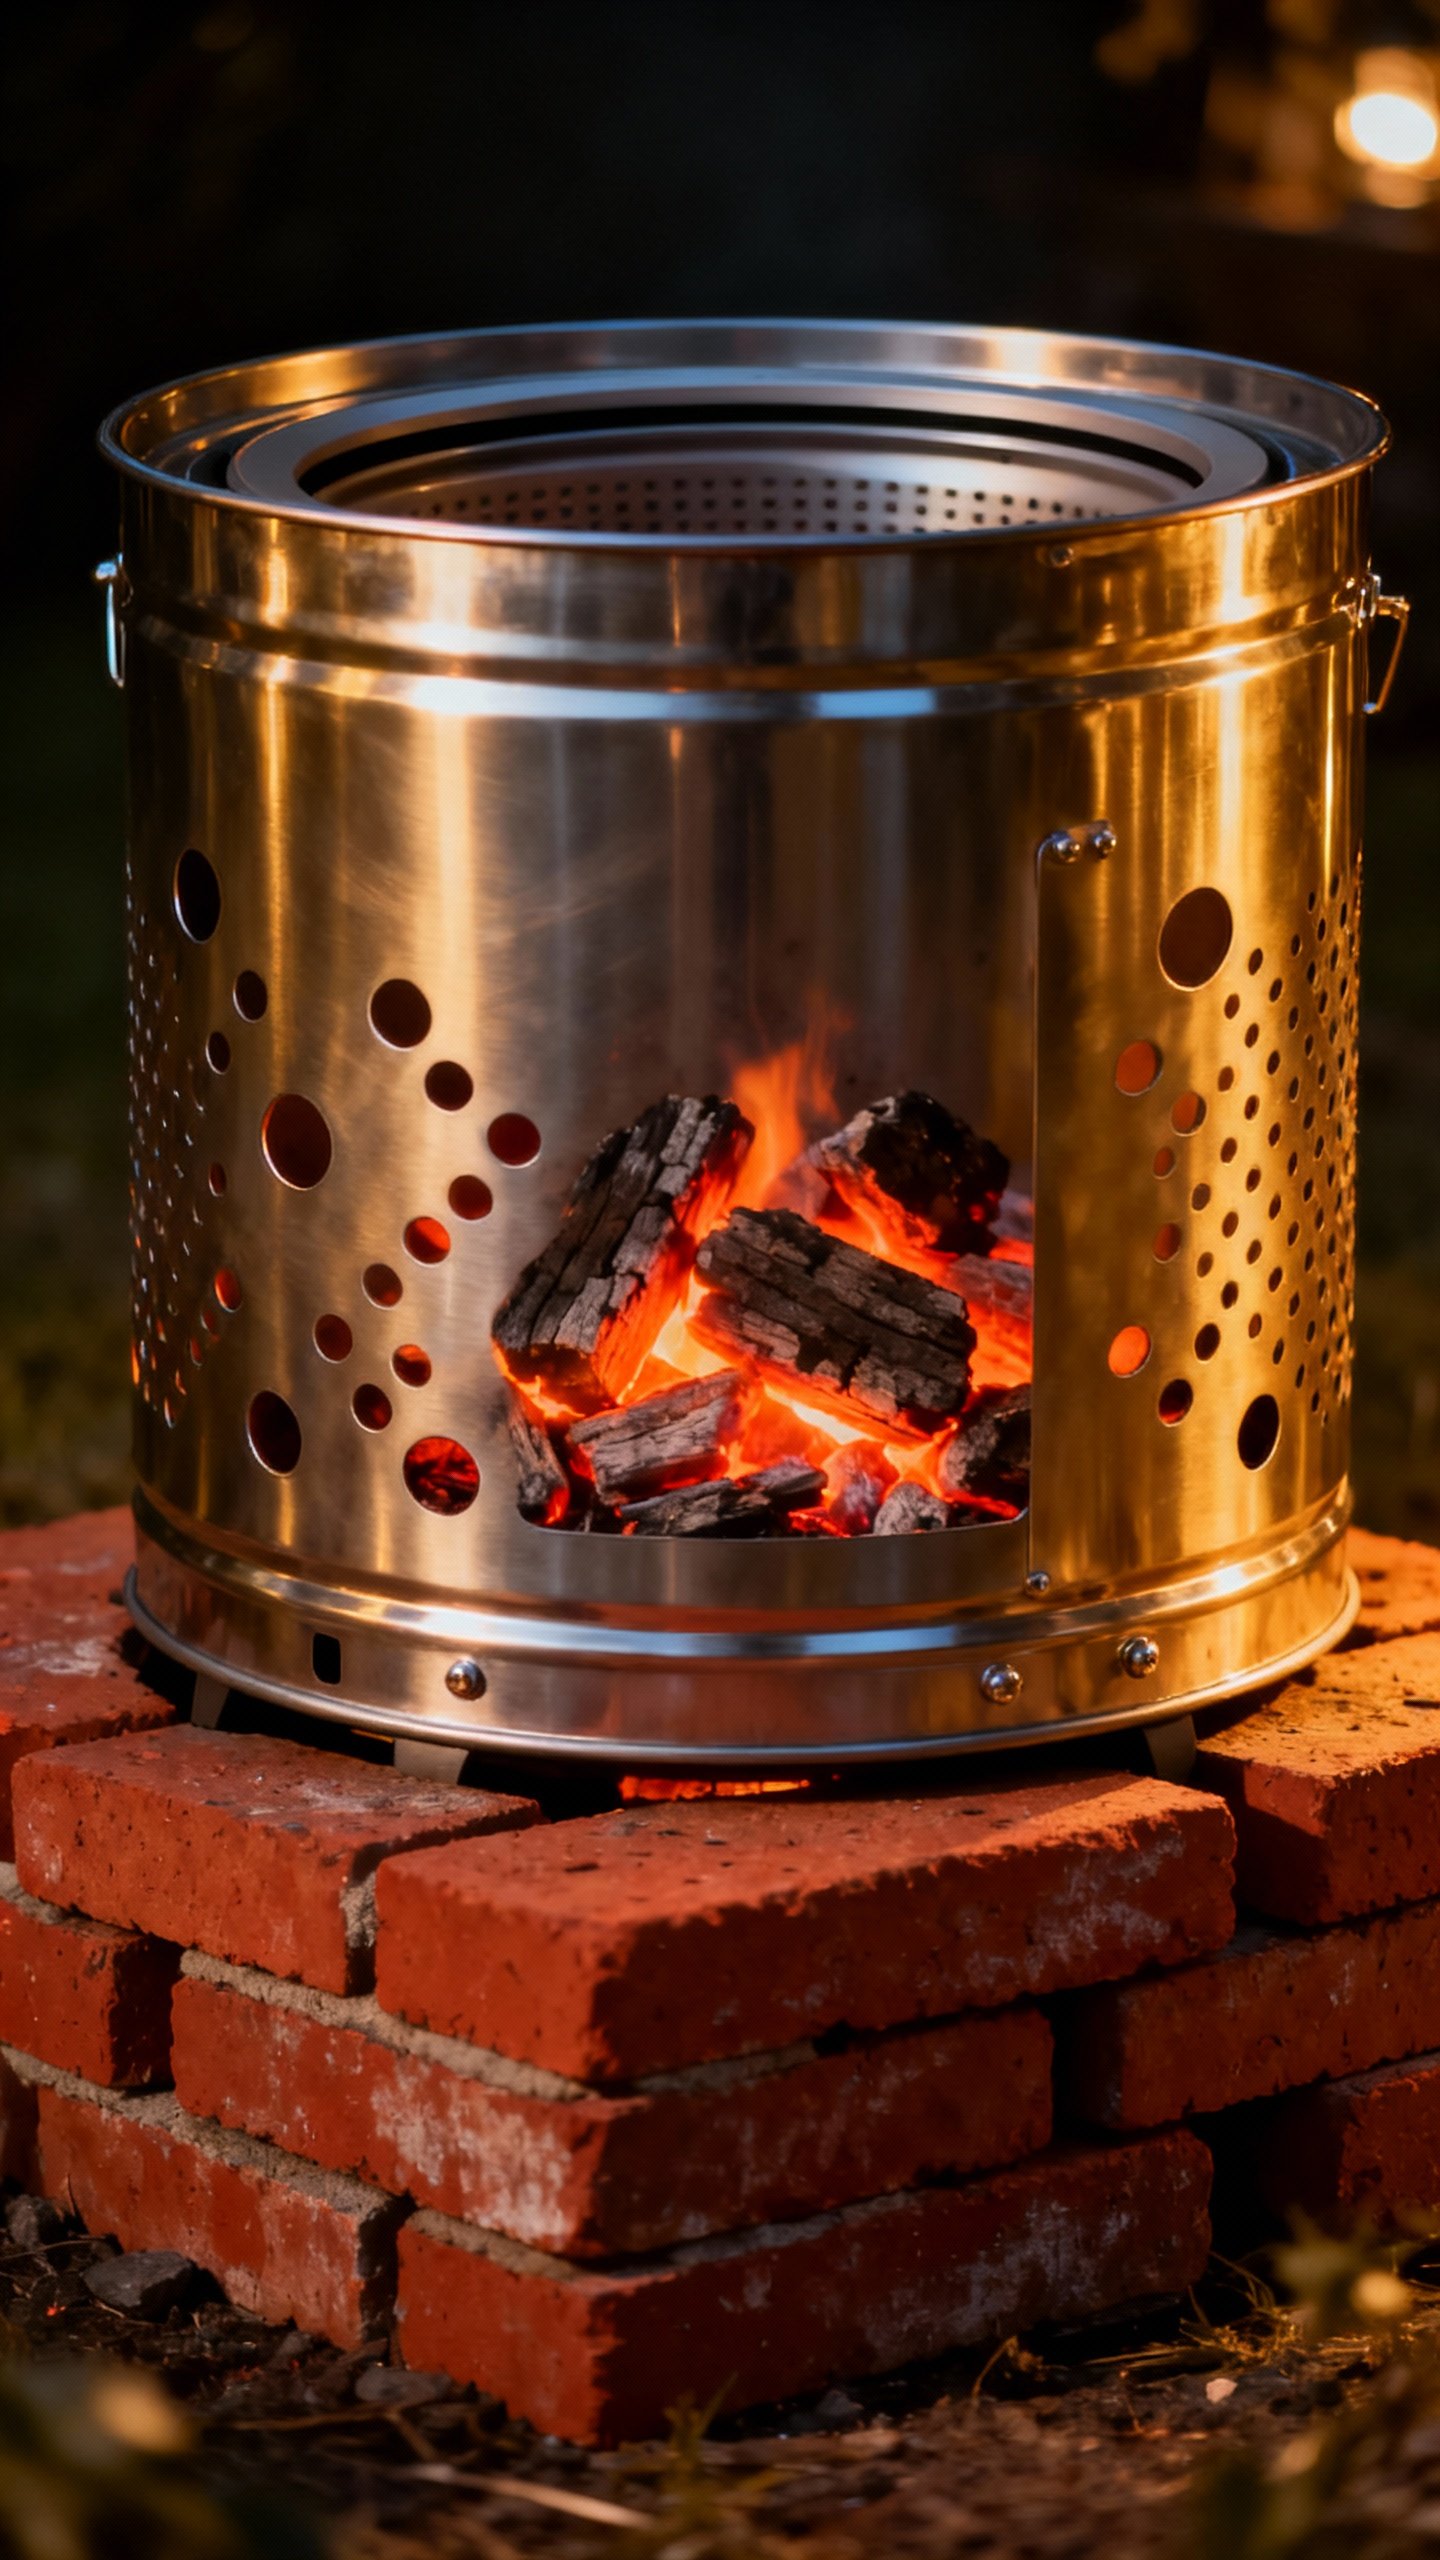
Project 3: Upcycled Drum Pit (Cheap, Chic, and Hot)
The stainless drum from an old washing machine makes a surprisingly awesome fire pit. It’s perforated, which equals great airflow.
Build Steps
- Remove the drum.
Clean it thoroughly.
- Mount on bricks or a short stand for airflow and heat clearance.
- Add a ring of pavers or gravel around it for a finished look.
Why it rocks: It burns hot and clean, looks industrial-cool, and costs almost nothing. IMO, best bang-for-buck project on this list.
Seating, Safety, and the Extras That Make It Cozy

You built a fire pit. Now make it a hangout.
A few small upgrades go a long way.
Seating Ideas
- Adirondack chairs: Classic, comfy, cup-holder friendly.
- Built-in benches: Use landscape timbers or masonry.
- Movable stools: Great for tight spaces and extra guests.
Surface and Spark Control
- Gravel ring 3–4 feet wide around the pit stops mud and sparks.
- Spark screen: Especially key with kids, pets, or wind.
- Fire-resistant mat: If you’re on a deck or near pavers you love.
Ambience Boosters
- String lights, weatherproof pillows, and a small side table for plates.
- Blanket basket. Because no one brings their own blanket, apparently.
- Storage bin for kindling, lighter, and skewers so you’re not hunting every time.
Wood vs. Gas: The Eternal Backyard Debate
You can’t lose here, but you should pick what matches your lifestyle.
- Wood: Cheapest setup, big flames, that campfire smell.
Requires wood storage and cleanup.
- Gas: Instant on/off, clean, deck-friendly. Higher upfront cost and a bit of setup.
Pro Safety Reminders
- Keep a hose, sand bucket, or fire extinguisher nearby. Always.
- Never burn treated or painted wood.
Toxic and gross.
- Watch the weather. Skip windy nights.
- Let ashes cool completely, then store in a metal bin for 24–48 hours.
Budget and Time: What to Expect
You don’t need a trust fund. You just need to plan.
- Stone ring: $150–$350, 1–2 days.
- Concrete bowl: $80–$200, 2–3 days including curing.
- Upcycled drum: $0–$60, a few hours.
- Gas conversion/kit: $200–$800+, half a day (or get a pro for hardline gas).
FAQ
Do I need a permit for a backyard fire pit?
Maybe.
Cities vary wildly. Some allow small recreational fires without a permit; others require specific pit dimensions or even ban wood-burning during certain months. Quick call to your local fire department saves headaches (and fines).
What’s the best base material under a fire pit?
Use compacted gravel topped with sand or pea gravel.
It drains well and resists heat. Avoid plain soil (gets muddy) and, please, no bark mulch unless you enjoy accidental bonfires.
Can I put a fire pit on my deck?
Yes, but be smart. Use a gas-rated fire table or a pit specifically approved for decks, plus a heat-resistant mat.
Keep clearances and never set a wood-burning pit directly on composite or wood without protection.
How do I reduce smoke?
Burn seasoned hardwood (oak, maple, ash), keep logs small, and maintain airflow. Consider a “smokeless” double-wall design or add a metal insert. Wet wood equals smoke city.
What size should my fire pit be?
For most backyards, 36–44 inches outer diameter hits the sweet spot.
Inner burn area around 24–30 inches. Height around 12–18 inches so you still feel the heat while seated.
Is lava rock or fire glass better?
For gas pits, both work. Lava rock is cheaper and rustic.
Fire glass looks fancy and reflects light. For wood pits, stick to lava rock if you need filler—glass and wood don’t mix well.
Common Mistakes (So You Can Skip Them)
- Skipping the base prep: Uneven pits look bad and feel worse.
- Building too close: Fences, trees, sheds—no thanks.
- Too tall walls: They block heat. Stay under 18 inches.
- Wrong materials: Regular bricks and non-fire-rated stones can crack under heat.
- No airflow: Leave small gaps at the bottom row or drill intake holes in metal pits.
Conclusion
A fire pit makes your backyard feel like a destination, not just a patch of grass.
Pick a style, prep a solid base, and build something you’ll actually use. Whether you go rustic stone, modern concrete, or upcycled steel, the flames do the heavy lifting. Light it up, pass the s’mores, and enjoy your new favorite room—outside, under the stars.
IMO, that’s time and money well spent.

