Small kitchen chaos? Been there. The good news is your tiny space can cook big vibes with the right moves. We’re talking smart storage, sneaky design tricks, and a few tweaks that make your countertops look like they actually exist. Let’s turn your mini kitchen into a functional, gorgeous setup you’ll brag about.
1. Build Up, Not Out: Vertical Storage That Works Overtime
When floor space is scarce, your walls are basically free real estate. Use them. The goal is to get as much off the counters as possible without making your kitchen look like a garage.
Make Your Walls Work
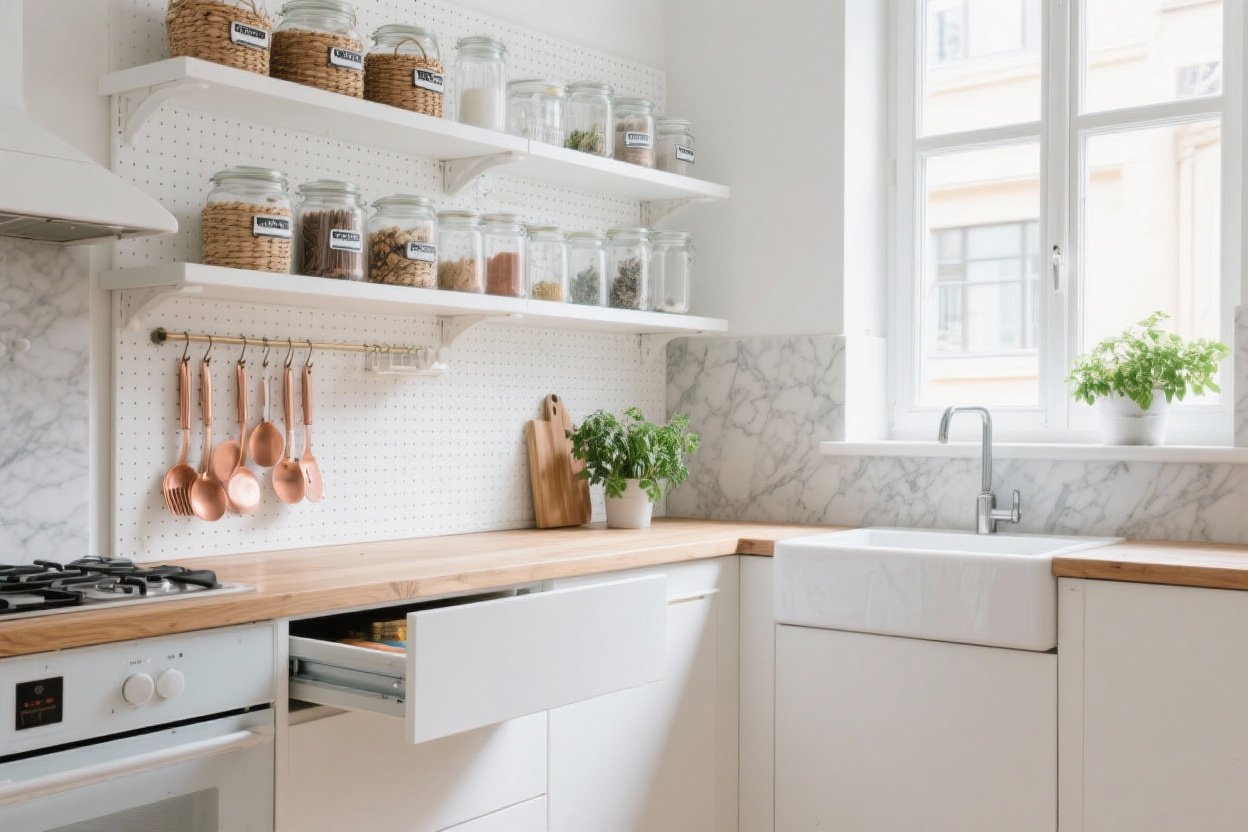
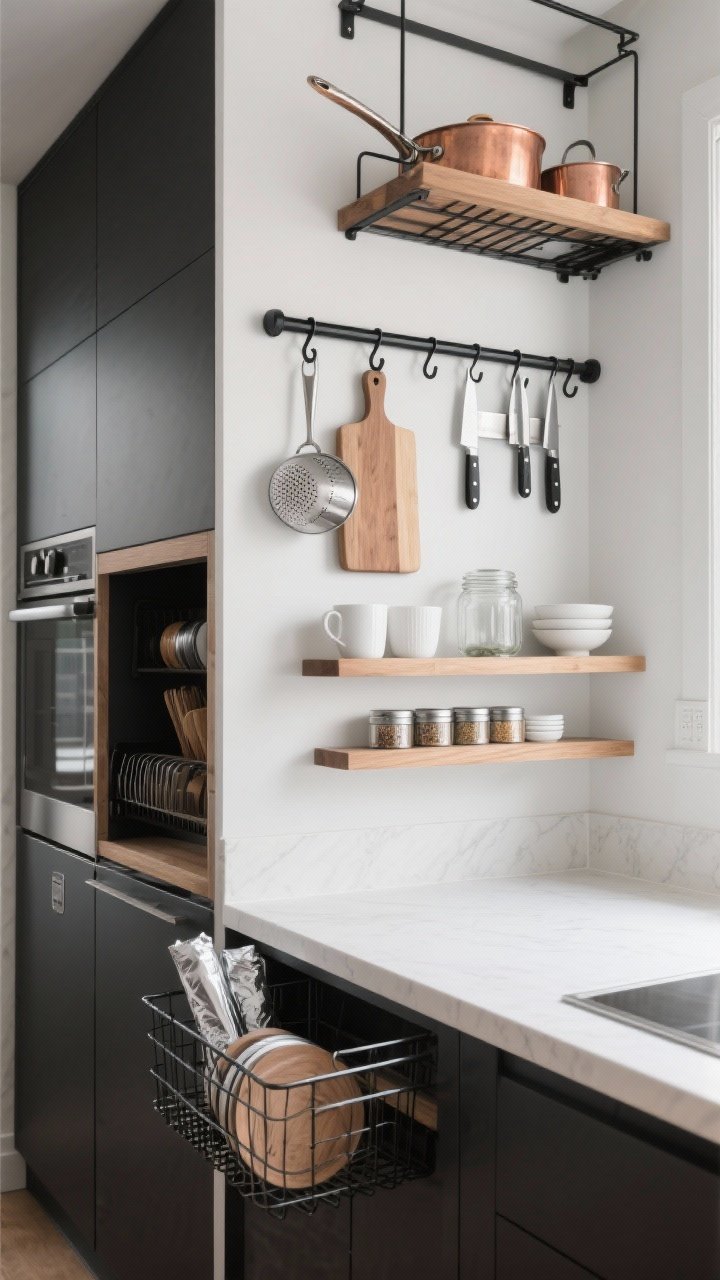
- Rail systems with S-hooks: Hang ladles, measuring cups, colanders, even a cutting board. It’s a chef-y look and frees drawers.
- Magnetic knife strips: Safer than a knife block and way slimmer. Add a second strip for spice tins—tiny but mighty.
- Floating shelves: Keep them shallow (6–8 inches) for mugs, jars, and bowls. Style the front, stash the less-cute stuff in back.
Use the Secret Zones
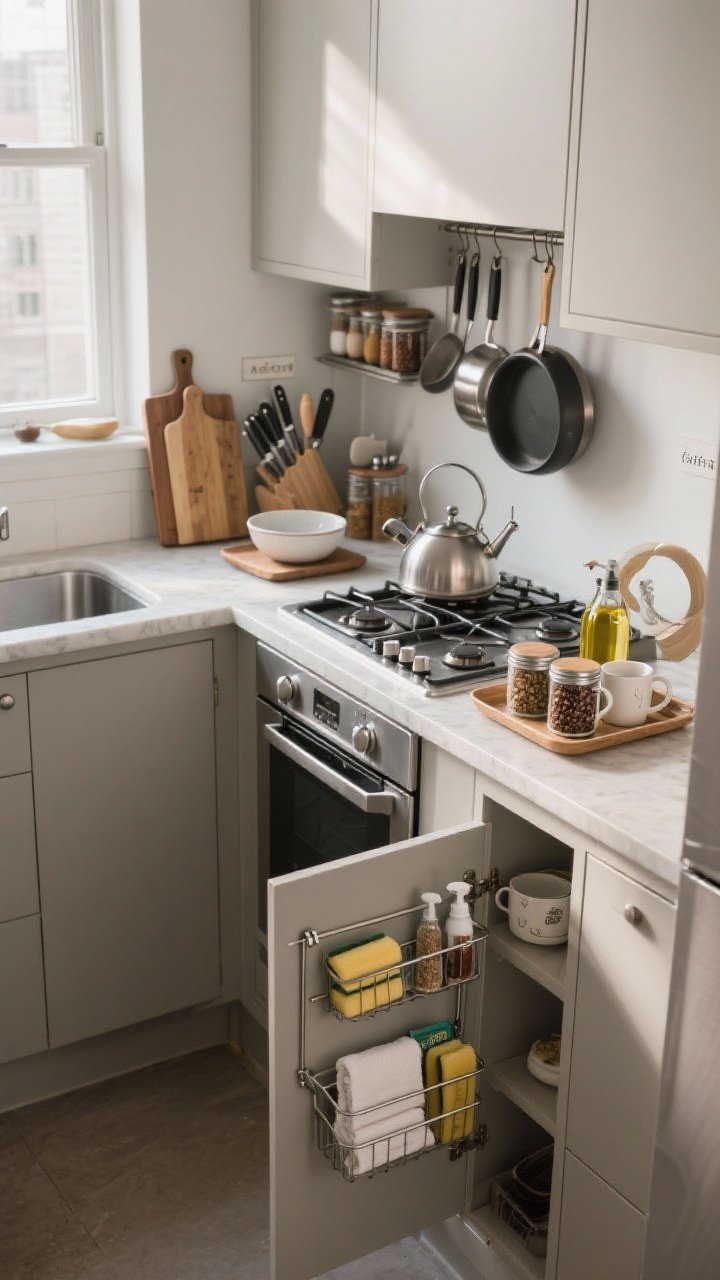
- Inside cabinet doors: Mount low-profile racks for wraps, foil, and pot lids. Zero footprint, big payoff.
- Under-shelf baskets: Slide onto existing shelves to create an extra layer for plates, napkins, or snack bags.
- Ceiling space: A small pot rack or a single hanging bar over an island/cart keeps bulky cookware accessible.
Pro tip: Keep vertical storage visually light. Match metals or wood tones and stick to one or two finishes so it reads intentional, not chaotic.
2. Zone Like a Stylist: Create Micro-Stations for Everything
Clutter happens when everything lives everywhere. Instead, carve your tiny kitchen into micro-zones. It’s the secret sauce to a space that runs like a well-trained cafe.
Map Your Zones
- Prep Zone: Cutting boards, knives, mixing bowls, oils, and salt/pepper live together. Keep this near the biggest stretch of counter (even if it’s 18 inches).
- Cooking Zone: Pots, pans, spatulas, oven mitts, and spices you actually use. Hang the most-used tools within arm’s reach of the stove.
- Coffee/Tea Zone: Corral mugs, beans/tea, kettle, filters, and a scoop on a tray. One small tray = instant aesthetic and easy cleanup.
- Cleaning Zone: Under-sink caddy with sponges, dishwasher tabs, towels, and a spray bottle. Add a tension rod for spray handles to hang.
Contain the Chaos
- Trays and turntables keep like-with-like and make deep shelves usable. A small lazy Susan in a cabinet = no more spice avalanches.
- Label lightly: Use simple labels or paint pens on jars and bins. FYI, labels stop the “where does this go?” debate in shared kitchens.
Pro tip: If a zone feels cramped, you’re storing too much there. Shift rarely used items to a higher shelf or a closed bin and keep the hot stuff prime.
3. Max Out Drawers and Cabinets: Smart Inserts, Smarter Tetris

Most small kitchens don’t lack space—they waste it. The fix? Modular inserts and a little Tetris brain. This is where your storage goes from meh to chef.
Drawer Magic
- Adjustable dividers: Customize for utensils so they don’t slide around. Dedicate one narrow slot for “daily tools” you grab constantly.
- Tiered organizers: Double-level spice or utensil trays give you an extra layer without a renovation.
- File your cutting boards and lids: Use vertical racks so they stand up. No more clattering pile-ups when you just want one lid.
Cabinet Upgrades
- Pull-out shelves: Retrofit lower cabinets with slide-outs. It’s like going from flip phone to smartphone.
- Stack risers: Create second “floors” for plates and bowls. Keep stacks short to avoid wobble city.
- Door-mounted spice racks: Free up shelf space and make everything visible at a glance.
Pantry-Lite Strategy
- Uniform, square containers: They stack cleaner than round canisters and use every inch. Label the front and the top.
- Decant selectively: Only for items you buy on repeat (rice, oats, flour). Don’t decant the random quinoa you bought once in 2019.
- Backstock bin: Keep duplicates in a single bin on a high shelf. When it’s full, that’s your stop sign.
Pro tip: Measure your drawers and cabinets before buying organizers, IMO the number-one mistake is “eyeballing it” and ending up with a graveyard of misfit bins.
4. Borrow Space You Don’t Have: Carts, Foldables, and Sneaky Surfaces
When your kitchen is tiny, you need furniture that hustles. Think rolling, folding, stacking, and hiding in plain sight. It’s like giving your kitchen superpowers.
Movable MVPs
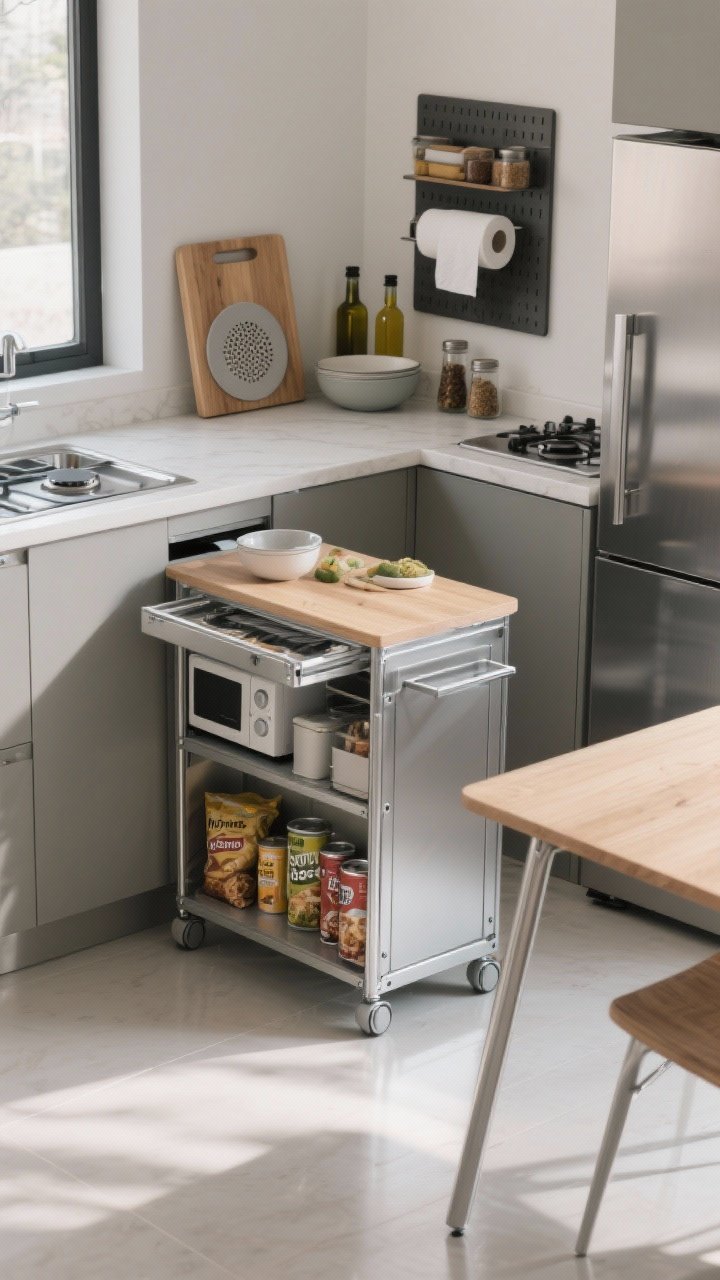
- Rolling cart: Park it as an island, move it out for parties, or stash it by the wall. Top: prep zone. Middle: appliances. Bottom: bulk goods.
- Drop-leaf table: Folds down to nothing, flips up when you need extra counter space. Great for micro-lofts and rentals.
- Slim pantry on wheels: Slides between fridge and wall for oils, cans, and snacks. Hidden, but heroic.
Counter Space, But Make It Disguised
- Over-sink cutting board: Doubles your prep area without stealing space. Bonus points for one with a colander insert.
- Stove covers (burner boards): Create a smooth surface for mixing bowls or cooling racks. Just let things cool first, obviously.
- Magnetic side of the fridge: Mount a shelf for paper towels, spices, and oil. Keep it curated to avoid the “stuffed dorm fridge” look.
Appliance Audit
- Go multi-use: Choose appliances that earn their footprint—air fryer toaster oven, immersion blender, or a rice cooker that slow-cooks.
- Rotate seasonally: If the stand mixer is a winter warrior, store it high in summer. Keep only what you use weekly within reach.
Pro tip: Give rolling pieces a “home base” so your kitchen resets quickly after cooking. Visual calm = mental calm.
5. Style Meets Function: Beautiful Basics That Also Organize
Small doesn’t mean boring. When every item is visible, make it pretty and practical. Think curated, not cluttered—like a boutique pantry that just happens to be your house.
Choose Workhorse Materials
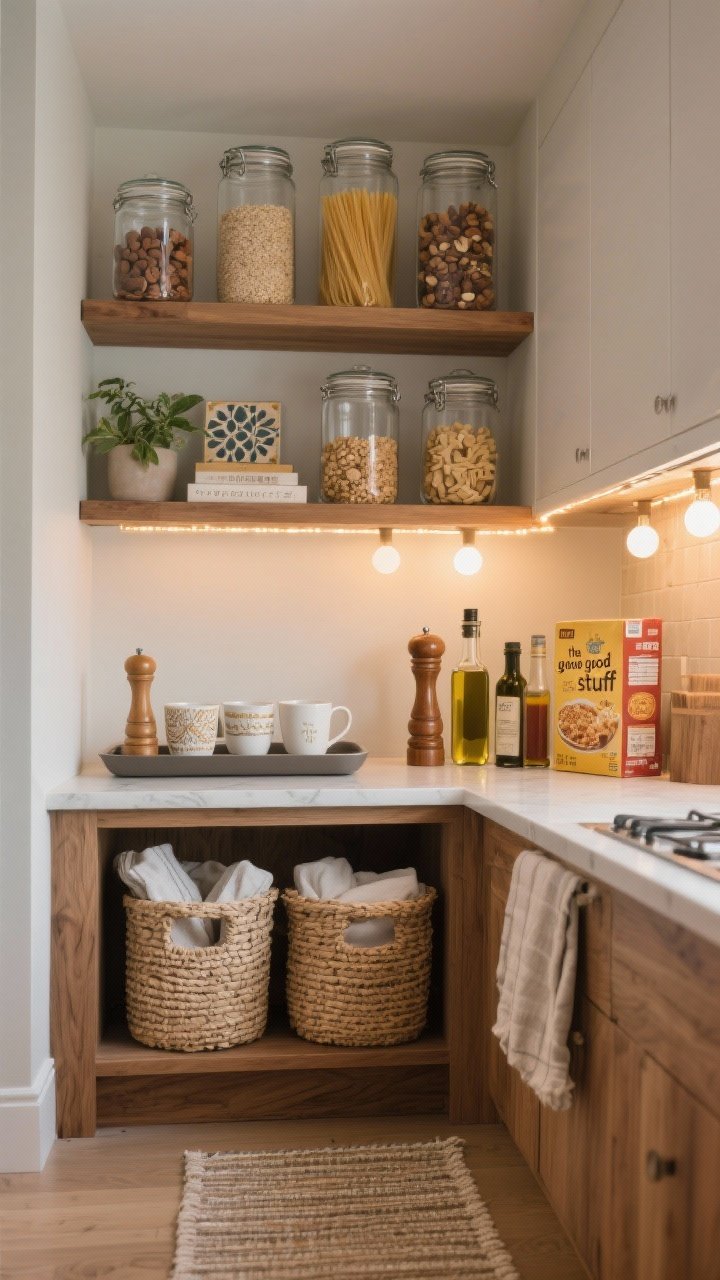
- Clear glass jars for grains, nuts, pasta. They look good and tell you when you’re low at a glance.
- Woven bins for snacks and linens: hide the chaos, keep the texture. Mix with metal for a balanced look.
- Solid trays for oils and condiments: catches drips and makes cleaning a 5-second job.
Create Visual Breathing Room
- Color-limit your palette: Two wood tones max, one metal finish, and neutral containers. It’s instant cohesion.
- Display the good stuff: Pretty mugs, a wooden pepper mill, your best olive oil. Hide the neon cereal boxes (sorry, nostalgia).
- Open shelving rules: One decorative item per shelf—plant, art tile, or a cookbook—then the rest is pure function.
Lighting = Luxury
- Under-cabinet lights: Peel-and-stick LED strips brighten prep zones and make things feel bigger. Cheap, high impact.
- Warm bulb swap: Replace harsh cool bulbs with warm white. Your countertops and your mood will thank you, FYI.
Pro tip: A small rug or runner defines the space and adds warmth—just pick one that’s machine washable because… real life.
Quick-Start Checklist
- Install a rail + S-hooks next to the stove.
- Add a magnetic knife strip and a lazy Susan for spices.
- Create a tray-based coffee station.
- Use dividers in your top drawer; file boards and lids vertically.
- Roll in a slim cart or over-sink board for instant counter space.
The bottom line: Organizing a small kitchen isn’t about buying 47 bins—it’s about giving every inch a job. Start with one zone, add one smart tool, and let momentum do the rest. You’ve got this—and yes, your tiny kitchen can absolutely cook big.